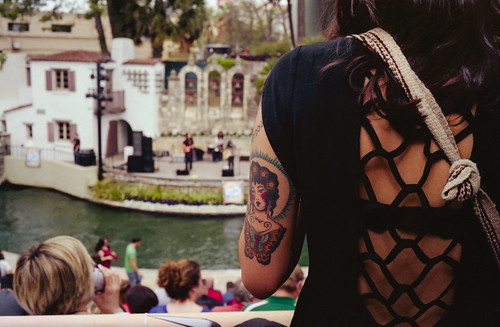
This was my first time ever I shot with a Kodak Tri-X roll of 120 film. I was using my beloved Yashica Mat 124G. The camera is great for street photography as long as you know how to meter using the Sunny 16 rule and if you're quick to focus manually. Once you get a few rolls in you'll master both the metering and the focusing on these quiet and fun cameras.
On this particular outing my first shot was that of a girl sitting on a concrete ledge putting on her makeup. Just a simple shot with not really much to it. Next to the girl were a group of street performers playing hip-hop songs and making up lyrics in real time. I decided to photograph them. As I got up to take the photo, the singer made up some lyrics similar to "This guy taking my picture, with old-school cameras and a black hat." Except his lyrics actually rhymed.
Whenever I'm shooting film, I adjust my settings as I'm walking. Not only is that good practice for "calibrating" my internal metering, but if something pops up I'm ready to shoot it. I walked to Travis Park which since foregoing the renovation, it's a much nicer park than before; when I used to avoid it by any means necessary. I passed by Peacock Alley on Navarro St and saw this person on their knees and I moved on. I saw the person, but that light is what made me go back about two steps to take this photo.
Eventually I reached Travis Park and shot a few frames there but nothing too spectacular. I knew this was going to be the first 120 film to self develop so I was trying to use all the frames on it. I took a few architectural shots of the Tower Life building's "gargoylish" faces to finish up the roll.
Then the nightmare started. I did not practice loading a 120 film into the developing tank's reel. Without any experience, it's a little bit harder than loading 135 (35mm) film in it. First, I could not get the film into the reel's grooves, then it would not catch the ball bearings on the reel. Sometime it seemed like everything was going OK but then I could feel the film mangle up so I had to start all over. Many times I was close to opening the bag and destroying the film by making it a practice roll but this meant ruining all the photos. By this time, I knew the film was in really bad shape, full of tears, crinkles, and definitely scratches. It should have taken about 2 min to load the film, instead I was there for about an hour. Eventually somehow I managed to load up the film in the reel and I was ready to develop it.
I went through the entire developing process exactly as it was featured on my video Street Photography: Shooting & Developing Film. When I pulled the film for drying, I noticed I had somehow managed to roll the entire roll into the first two grooves of the reel leaving no space for the developing chemicals to act. Some of the film's areas were not developed, and it was full of scratches and crinkles just like I had suspected. However, one frame did survive. And my policy is that if at least one frame from an entire roll of 24, 36, or in this case 12 frames, then the process it's worth it. After drying I decided to scan the film anyway. And as soon as I got to to scan this frame my disappointment turned into excitement.
A few days later I had another roll 120 to develop. This time instead of using the changing back I decided to lock myself in my closet to have more room to load the film into the reel. This made a great difference and I was able to load the film in about 10 minutes; still too long but not as long as 60 min. I also did not have one scratch on the film.
 |
| "Dark Alley Stories" by Jesse Acosta Tri-X 400 | Mat 124G | San Antonio, TX | 2014 |